


Many blogs now have AdSense Units or other ads and widgets in the header section of the blog.The most popular is the AdSense 468×60 unit beside the header text or image.In this post i will show you how you can also make the most of this space and have the option to place ads or any gadgets beside your header.

The default setting on Blogger is for the header to span the width of the blog and be used for the blog title only but this can easily be changed.The change used splits the header section into two separate sections and you are left with your actual blog title area on the left and you can add gadgets such as AdSense on the right.
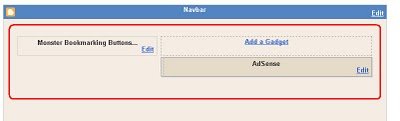
To show the effect using a two section header on your blog i added it to a demo blog. You will see i added the popular 468×60 AdSense unit to the blogs header.
This was the layout before the change
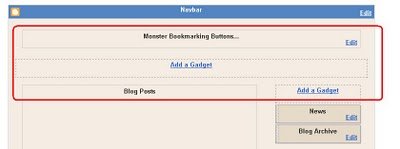
And after the change you can see i have a new ‘Add A Gadget’ area :
You can see a demo of the result on this blog using the blogger minima template : Blogger Split Header
This post is in response to a comment by dil2010 on the post Add A Full Lenght Gadget Or AdSense Leaderboard Below Your Blog Header great question dil2010, if you want to suggest a post you can contact me or leave a comment.
To split your blogs header into two sections you need to replace two pieces of code in your blogs html.Although they are two small sections of code any time you replace code you have to be careful and take your time.
First make sure your template is backed up and follow the steps – You can do it !
Split Blogger Header Into Two Sections
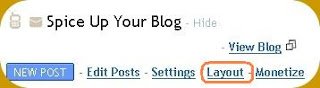
Step 1. In your dashboard click ‘Layout’ > ‘Edit Html’

Step 2. Find the following section of code in your blogs Html :
(Click Ctrl and F for a search bar to find the code – More Info)
#header {
margin: 5px;
border: 1px solid $bordercolor;
text-align: center;
color:$pagetitlecolor;
}
Note : The easiest way to locate this section is to first find #header and the rest will be below.This section in your template might be slightly different.
Step 3. You must now replace that section with this code :
#header {
float:left;
width:40%;
height:200px;
margin: 0px;
border: 0px solid $bordercolor;
text-align: center;
color:$pagetitlecolor;
}

#header2{float:left;
width:60%;
height:200px}
Note : If you feel comfortable you can change the width and height.
Step 4. Now find this section of code in your template :

<div id='header-wrapper'>
<b:section class='header' id="header' maxwidgets='1' showaddelement='no'>
<b:widget id='Header1' locked='true' title='NAME OF YOUR BLOG WILL BE HERE (Header)' type='Header'>
</b:widget>
</b:section></div>
Note : Once again start by locating <div id=”header-wrapper”> and you will see the rest below it.
The part in red will be the actual title of your blog.
Step 5. Replace that section of code with this code :
<div id='header-wrapper'>
<b:section class='header' id='header' maxwidgets='1' showaddelement='no'>
<b:widget id='Header1' locked='true' title='Blog-Title (Header)' type='Header'/>
</b:section>

<b:section class='header' id='header2' maxwidgets='4' showaddelement='yes'/>
<div style='clear:both;'/>
</div><!-- end header-wrapper -->
Note : As shown in red above you must add your blogs title.Leave the part (Header) in blue as it is.
Step 6. Once you have made the changes you can save your template and you layout page will now show a two piece header for your AdSense or other gadgets.
If you do have any difficulty just drop a comment and i will be glad to help, if you are planning to use the new section for AdSense make sure to check out some other AdSense tips.
I also have a very Popular AdSense article on Infobarrel you should check out.