


We all like images effects and adding some style to the pictures we use in our blogs posts.Some effects can be quiet elaborate (I have the very cool light box effect just about ready to publish) but sometimes a simple hover effect looks great.In a recent post i showed a rollover effect with some social icons changing one image to another on hover (we may look at using Css Sprites in future), in this post we will make your images simply Bump !
The bump effect is as the name suggests, when you hover your cursor over the image it bumps or raises up.In modern browsers like Firefox and Chrome the bump will be smooth however in Internet Explorer (Apart from IE9) it will still bump but not with the same grace.I have also added a border (Grey, color can be changed) with rounded corners (You know the IE story).Lets look at the demo, hover your cursor over the images on the demo page.
Adding The Css Bump Effect To Images On Your Blog
We need to add the Css that creates the effect to your blog and then add a class to the image link code.I will show you the steps below for Blogger, WordPress and other blog users could add the css to their style sheet and add the class as with blogger.
Add Bump To Blogger
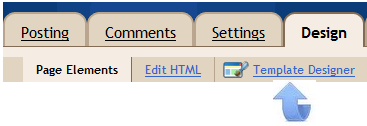
Step 1. In your Blogger dashboard click > Design > Template Designer > Advanced > Add Css (Easier than it sounds )
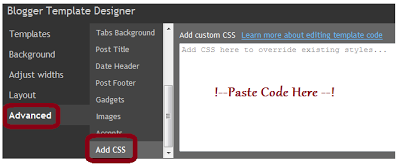
Step 2. Copy and paste the following code into the field marked paste code here in image above, then click ‘Apply To Blog’ :
.gobump img{
border: 5px solid #ccc;
float: left;
margin: 15px;
-webkit-transition: margin 0.5s ease-out;
-moz-transition: margin 0.5s ease-out;
-o-transition: margin 0.5s ease-out;
border-radius: 5px 5px 5px 5px;
}

.gobump img:hover {
margin-top: 2px;
}
Note – Change #ccc to change the color of the border – Find Hex Color Codes Here.
Step 3. That’s the Css to create the effect added to your template you now need to add a class to images you want to have the effect.First i will show you how to add this the general image codes and i will also show how it’s added to images uploaded to Blogger (Its the same but the visual will help beginners).
General Images
Below is the code for an image and highlighted you can see were i have added class=”gobump”.Simply add the class in this position and your images will Go Bump.
<a class="gobump" href="http://2.bp.blogspot.com/-J4F5bZ-oLBY/Tcg1lDks7kI/AAAAAAAADso/oxUTFPGQKiY/s1600/Chrysanthemum.jpg"><img src="http://2.bp.blogspot.com/-J4F5bZ-oLBY/Tcg1lDks7kI/AAAAAAAADso/oxUTFPGQKiY/s1600/Chrysanthemum.jpg"/></a>
Images Uploaded To Blogger
When you upload an image to Blogger click the edit html tab in the top right of the post editor to see the image code.The code will look as below, insert class=”gobump” as highlighted.

<div class="separator" style="clear: both; text-align: center;">
<a class="gobump" href="http://2.bp.blogspot.com/-J4F5bZ-oLBY/Tcg1lDks7kI/AAAAAAAADso/oxUTFPGQKiY/s1600/Chrysanthemum.jpg" imageanchor="1" style="margin-left: 1em; margin-right: 1em;"><img border="0" height="240" src="http://2.bp.blogspot.com/-J4F5bZ-oLBY/Tcg1lDks7kI/AAAAAAAADso/oxUTFPGQKiY/s320/Chrysanthemum.jpg" width="320" /></a></div>
And it’s that easy to have a simple Css Bump feature on your blogs images, with the added border and rounded corners.I have lots more Cool Css tricks lined up for future posts, as browser support improves for Css3 we have endless possibility’s.
Drop Your Comments And Questions Below.